Olsen dress sew-along – Part 5
We’ve now put together the main pattern pieces, with shoulder seams still open. We’ve prepared the bias tape and are ready to finish the neckline and armholes with it.
STEP 6
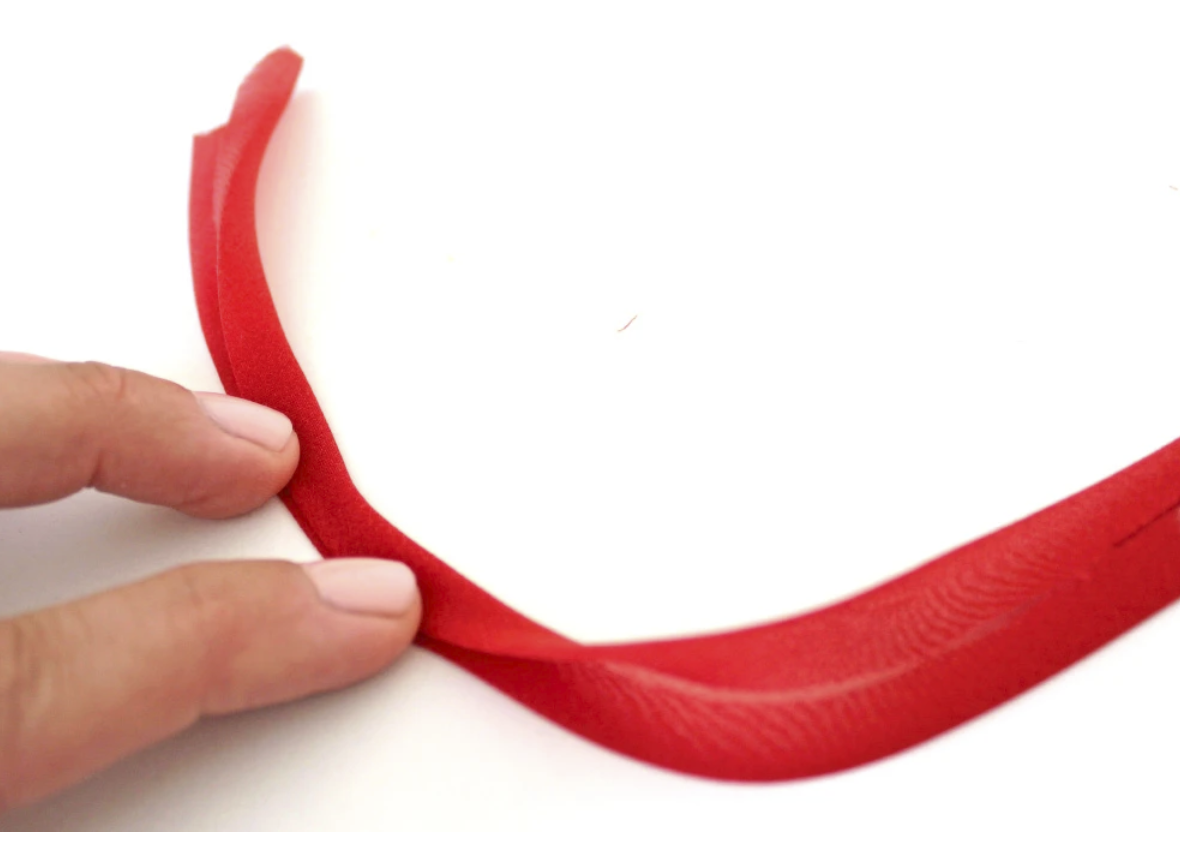
Making the bias tape slightly wider on one side is a great trick for achieving a professional finish. It makes it easier to catch the underside, which is something especially beginners might struggle with. The narrower side will be attached to the right side of the garment, and the wider side will be in the wrong side.
Unfold the tape and start pinning right side along one armhole, starting at the open shoulder seam.
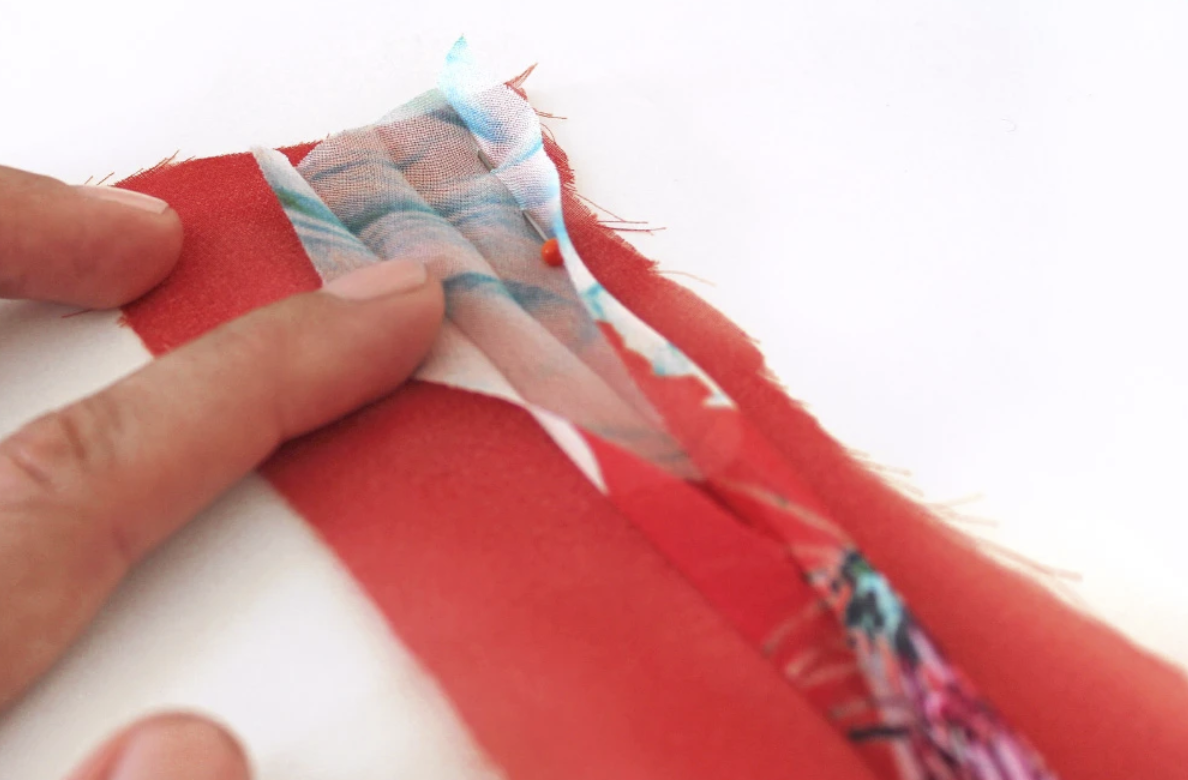
Sew along the first crease and press seam open so that all seam allowances face away from the garment.

STEP 7
Sew the shoulder seam continuing all the way to the edge of bias tape. Finish raw edges either beforehand separately, or finish both seam allowances together at the end. Use your overlocker, or a zig zag stitch or similar in your regular sewing machine.

STEP 8
Follow step 6 instructions to finish other armhole and neckline. Make sure the seam on the bias tape ends up at the back rather than front.
STEP 9
Sew other shoulder seam, now you have two bias tape edges to sew together.
STEP 10
Now we have the bias tape attached to all raw edges. Next, fold it over to the wrong side and secure with pins from the right side.

STEP 11
Topstitch from the right side.

Only elasticated waist and hemming left to do! Final part of the sew-along up next.


Leave a Reply