
Olsen dress sew-along – Part 3
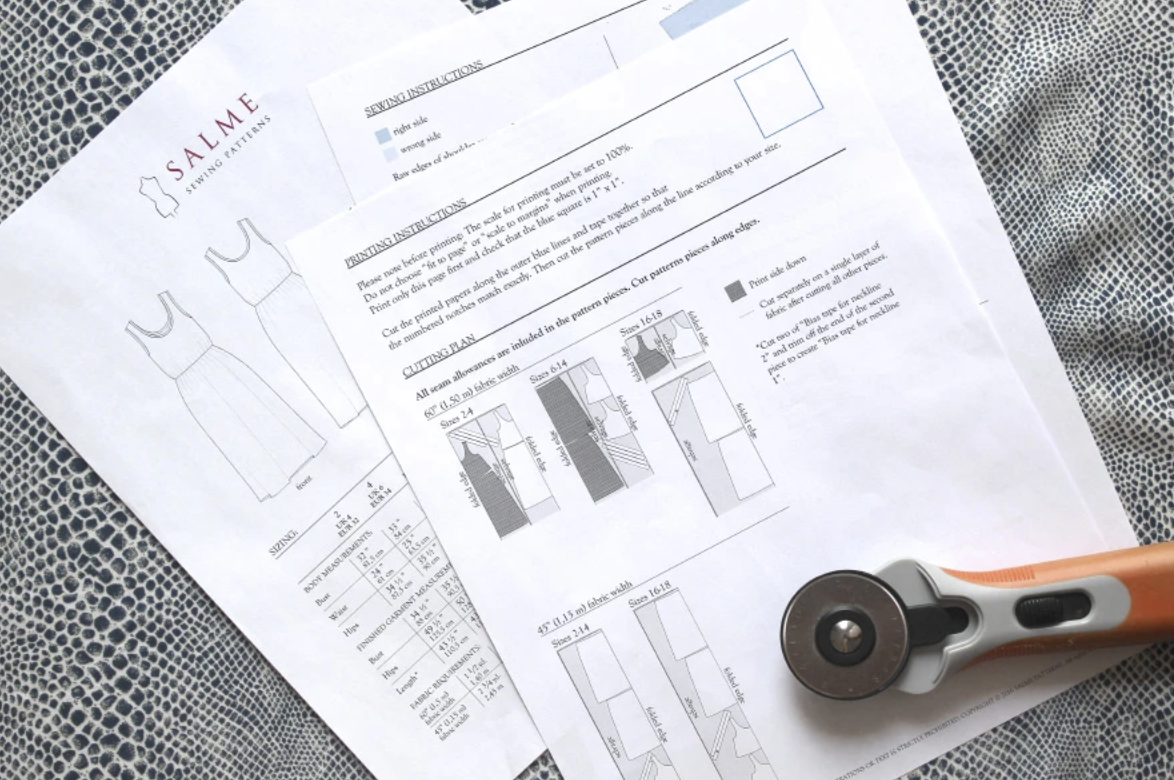
With the help of our tutorial you’ve hopefully managed to print the pattern in the right scale and have all the pattern pieces cut in your size. Now we’ll follow the cutting plan on the second page to lay out the pattern pieces and cut the fabric.
Before cutting you should always pre-shrink your fabric. This simply means washing it following the care instructions. Depending on the fabric you might not want to put raw edges through a washing machine, so consider washing it by hand instead. Iron the fabric after washing and you’re ready to start cutting.
Lay out the fabric following the diagram. I’m cutting a size US 4 on 65″ wide fabric, so the fabric is folded on two sides and the selvages meet in the middle. Measure from the fold to the selvage to make sure the width stays constant.
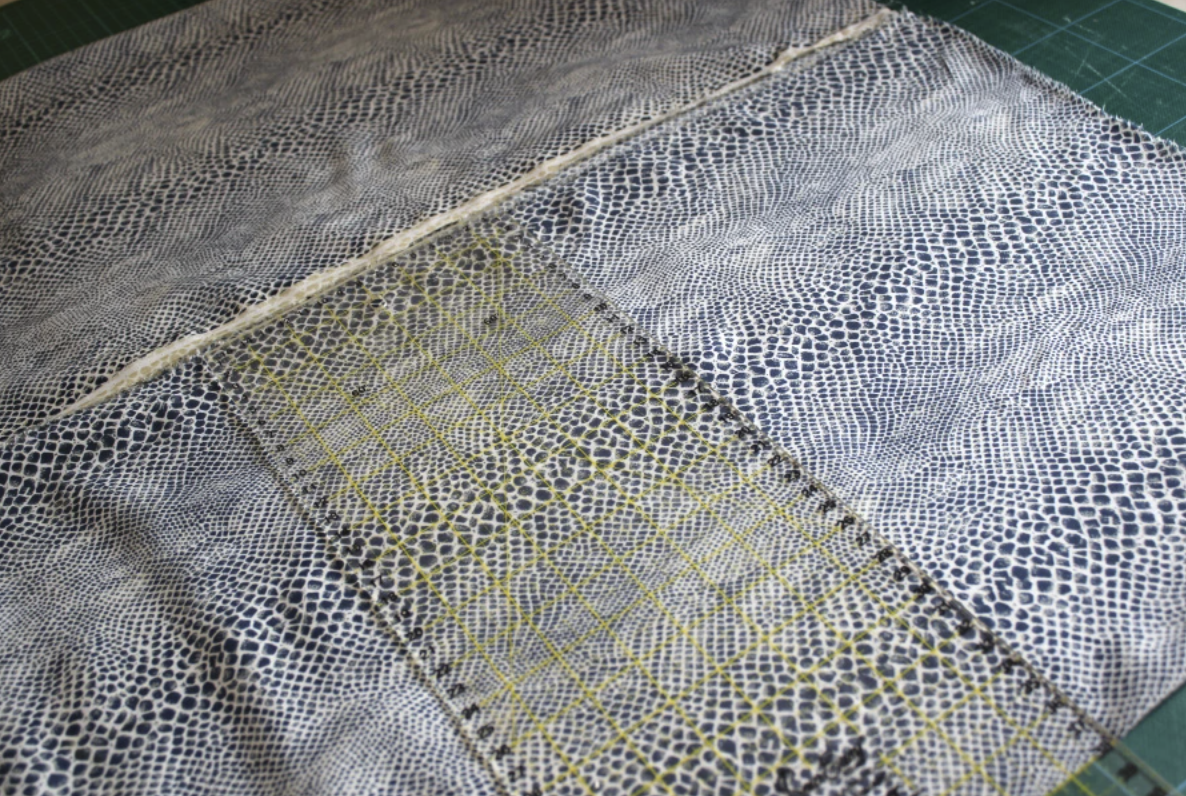
I’m laying out one of the bias cut strips first. Using a dressmaker’s ruler it’s easy to find the bias.

Line up the center front and center back edges with the fold. Use fabric weights or paper weights instead of pinning.

Note that some of the pattern pieces will lay print side down.

When all pattern pieces are in place, start marking with tailor’s chalk or a soft pencil.

Check that all markings are clearly visible and remove the pattern pieces.

Cut, making sure to cut away your tracing lines. I love to use a rotary cutter but sharp scissors will do just as well. Don’t forget the notches!

Next up on the sew-along we start sewing, and that’s actually the quick part!
Leave a Reply